Dazzling White Nails with Glitter: The Ultimate Guide
Contents
hide
The Timeless Appeal of White and Glitter
White nails with glitter combine elegance and sparkle, creating a stunning manicure that suits any occasion. This classic combination has stood the test of time, remaining a favorite among nail enthusiasts and professionals alike. The pristine white base provides a clean canvas, while the glitter adds a touch of glamour and excitement. Moreover, this versatile nail design can be adapted to suit various styles, from subtle and sophisticated to bold and eye-catching. White nails with glitter work well for everyday wear, special events, and even bridal looks.
Additionally, this manicure style complements all skin tones and nail shapes, making it a universally flattering choice. The contrast between the pure white and sparkling glitter creates a visually striking effect that draws attention to the hands. Furthermore, white and glitter nail designs offer endless possibilities for customization, allowing for personal expression and creativity. Whether opting for a full glitter overlay or delicate accents, this nail art combination never fails to impress. In the following paragraphs, we’ll explore different aspects of white nails with glitter, from application techniques to design variations and care tips.

Choosing the Perfect White Polish
Selecting the right white polish is crucial for achieving a flawless base for glitter accents. Nail polish brands offer a wide range of white shades, from pure snow white to softer, creamy hues. For a crisp, bright look, opt for a stark white polish with good opacity. These polishes typically require fewer coats to achieve full coverage, resulting in a smoother finish. Alternatively, choose an off-white or ivory shade for a softer, more natural appearance. These subtle variations can complement different skin tones and create a unique backdrop for glitter elements.
Additionally, consider the finish of the white polish. A glossy white provides a sleek, modern look, while a matte white offers a sophisticated, velvety appearance. Some white polishes also come with built-in shimmer or pearl effects, adding depth to the base color. When selecting a white polish, pay attention to the formula quality. Look for polishes that offer streak-free application and quick drying times. High-quality white polishes will provide better coverage and longevity, ensuring your manicure looks fresh for longer. Lastly, don’t forget to use a good base coat before applying white polish to prevent staining and improve adherence.
Glitter Selection: Types and Textures
The choice of glitter can dramatically impact the final look of white nails with glitter. Glitter comes in various forms, sizes, and colors, each offering unique effects. Fine glitter creates a subtle, shimmering appearance, perfect for a more understated elegance. On the other hand, chunky glitter makes a bold statement, adding texture and dimension to the nails. Holographic glitter reflects light in rainbow hues, creating a mesmerizing, color-shifting effect against the white base. Additionally, consider the shape of the glitter particles. Round glitters offer a classic sparkle, while hexagonal or star-shaped glitters add interesting visual elements.
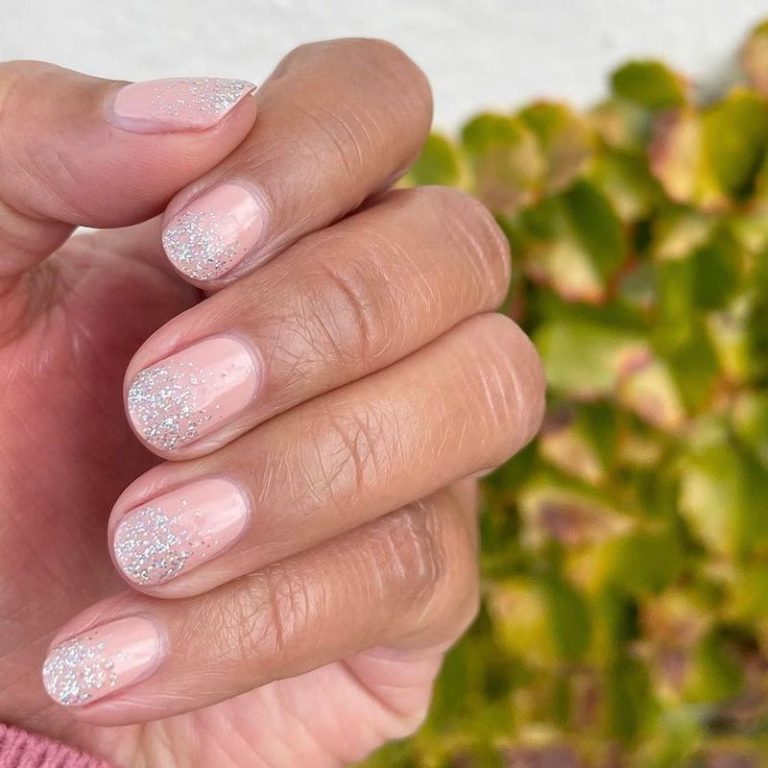
The color of the glitter also plays a crucial role in the overall design. Silver glitter on white nails creates a crisp, icy look, ideal for winter-themed manicures. Gold glitter adds warmth and luxury, perfect for special occasions or festive seasons. For a softer appearance, try pastel or iridescent glitters that complement the white base without overpowering it. Moreover, multi-colored glitter mixes can create a fun, playful effect on white nails. When choosing glitter, consider the size of your nails and the desired effect. Larger nails can accommodate chunkier glitters, while smaller nails may benefit from finer, more delicate sparkle.
Application Techniques for Glitter on White Nails
Applying glitter to white nails requires skill and patience to achieve a polished result. One popular method involves using a glitter polish over the white base. Apply the glitter polish in thin, even coats, building up the intensity as desired. For a gradient effect, start with a heavier application at the tips or base of the nail, gradually tapering off towards the opposite end. Another technique involves manually placing loose glitter on the nails. After applying a layer of clear polish or nail glue, use a small brush or toothpick to precisely position individual glitter particles. This method allows for greater control over the glitter placement and density.
Additionally, try the sponge method for a more even distribution of glitter. Paint a small amount of glitter polish onto a makeup sponge, then dab it onto the white nails. This technique creates a smoother, more uniform glitter coverage. For a subtle sparkle, mix a small amount of loose glitter into clear polish and apply it as a topcoat over the white base. Experiment with different application methods to find the one that best suits your desired look and skill level. Remember to seal the glitter with a generous layer of top coat to ensure a smooth finish and prevent the glitter from catching on clothing or hair.
Full Glitter Coverage vs. Accent Nails
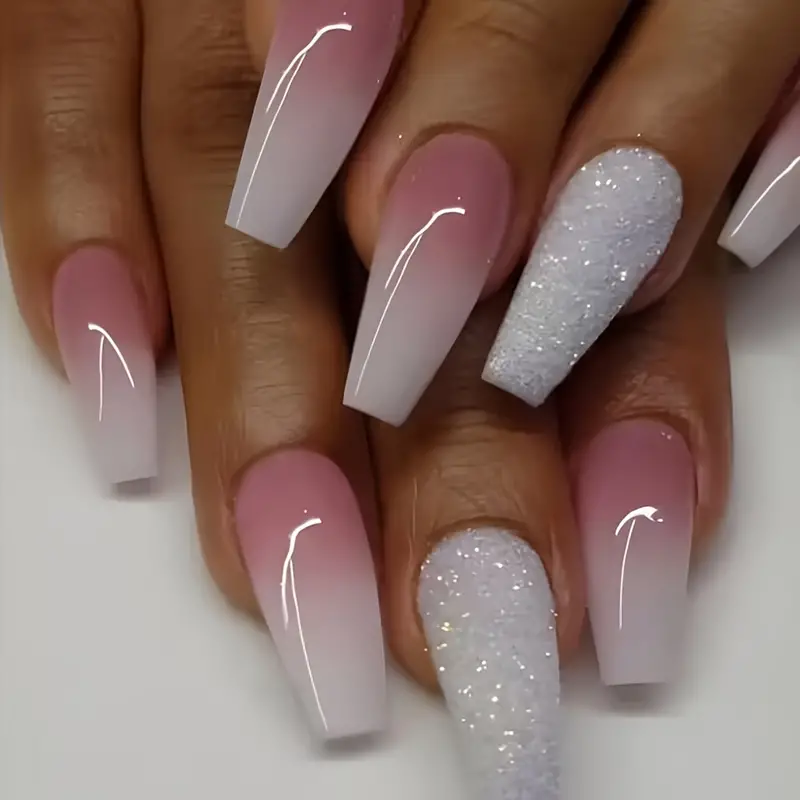
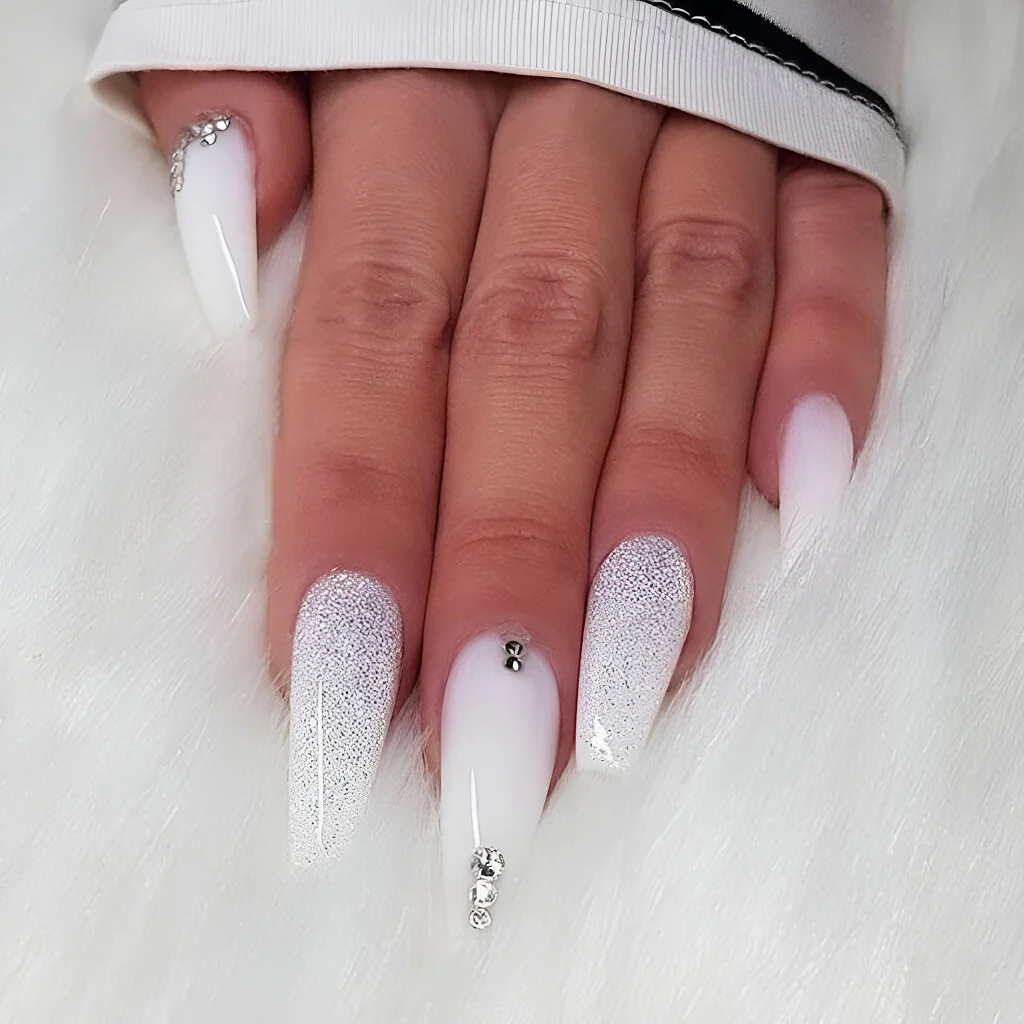
Deciding between full glitter coverage and accent nails can significantly impact the overall look of white nails with glitter. Full glitter coverage creates a bold, eye-catching effect, perfect for special occasions or when you want to make a statement. This style involves applying glitter to all nails, either as a complete overlay or in intricate patterns. Full coverage glitter nails pair beautifully with a crisp white outfit or add a touch of glamour to a simple ensemble. On the other hand, accent nails offer a more subtle approach to incorporating glitter into a white manicure.
Typically, one or two nails on each hand feature glitter, while the rest remain solid white. This creates an interesting contrast and allows for more versatility in everyday wear. Accent nails can be placed on the ring finger, thumb, or any finger of choice. Moreover, combining full coverage and accent techniques can result in unique designs. For instance, try alternating between solid white nails and full glitter nails for a striking, balanced look. Another option is to apply glitter to the tips of white nails, creating a sparkling French manicure effect. Experiment with different combinations to find the perfect balance between elegance and sparkle that suits your personal style and the occasion.
Creating Patterns and Designs with Glitter
White nails provide an excellent canvas for creating intricate patterns and designs with glitter. One popular technique involves using nail tape or stencils to create geometric shapes on white nails, then filling them in with glitter. This method allows for precise lines and crisp edges, resulting in a professional-looking manicure. Try creating triangles, stripes, or chevron patterns for a modern, stylish look. Another approach is to use a thin brush to hand-paint glitter designs onto white nails. This technique offers more flexibility and allows for creating detailed patterns like flowers, stars, or swirls. Additionally, experiment with negative space designs by leaving portions of the white nail exposed while applying glitter to others.
This creates an interesting contrast and adds depth to the overall look. Ombré or gradient effects can also be achieved by gradually blending glitter from the tips or base of the nail into the white polish. For a unique twist, try reverse glitter placement by applying glitter to the nail bed and leaving the tips white. This unexpected design adds a touch of whimsy to the classic white and glitter combination. Lastly, consider combining different glitter colors or sizes within a single design for added visual interest and texture.
Seasonal and Themed White and Glitter Manicures
White nails with glitter can be adapted to suit various seasons and themes, making them a versatile choice year-round. For spring, incorporate pastel glitters in soft pink, lavender, or mint green over a crisp white base. Add small floral designs or butterfly accents for a fresh, romantic look. Summer calls for bold, bright glitters in shades like turquoise, coral, or sunny yellow. Create beachy vibes by adding seashell or palm tree nail art to white and glitter nails. As autumn arrives, shift to warm, rich glitter tones like gold, bronze, or deep red. Incorporate leaf patterns or use matte top coats for a cozy, seasonal feel.
Winter-themed white and glitter nails can feature icy blue or silver glitters, reminiscent of snowflakes and frost. Add snowflake designs or crystal embellishments to capture the magic of the season. Furthermore, white and glitter nails work well for holiday-specific manicures. Try red and green glitters for Christmas, or black and orange combinations for Halloween. Bridal manicures often feature white nails with delicate silver or pearl glitter accents, creating an elegant and timeless look for the big day. Additionally, patriotic themes can be achieved by combining white nails with red and blue glitters for national celebrations.
Caring for White and Glitter Nails
Maintaining the beauty of white nails with glitter requires proper care and attention. Start by applying a quality base coat before the white polish to prevent staining and improve longevity. When painting nails white, apply thin, even coats to avoid streaking and ensure smooth coverage. Allow each layer to dry completely before adding the next. To preserve the vibrancy of white nails, avoid exposing them to substances that can cause discoloration, such as coffee, tea, or certain foods. Wear gloves when doing household chores or working with potentially staining materials.
Additionally, use a non-acetone nail polish remover when changing your manicure, as acetone can yellow white polish. To keep glitter looking fresh and sparkly, apply a generous layer of top coat. This not only seals in the glitter but also creates a smooth surface, preventing snags on clothing or hair. Reapply the top coat every few days to maintain shine and protect the manicure. If glitter starts to lift or peel, resist the urge to pick at it. Instead, file down the affected area gently and reapply a small amount of glitter if necessary. Lastly, keep nails and cuticles moisturized with cuticle oil or hand cream to prevent dryness and maintain overall nail health.

Professional vs. DIY White and Glitter Manicures
Choosing between a professional salon service and a DIY approach for white nails with glitter depends on various factors. Professional manicures offer the advantage of expert application and high-quality products. Nail technicians have experience in creating flawless white bases and applying glitter evenly. They also have access to a wide range of glitters and can create intricate designs with precision. Professional manicures often last longer due to proper preparation and sealing techniques. Additionally, salon services may include nail shaping, cuticle care, and hand treatments, providing a comprehensive nail care experience.
On the other hand, DIY white and glitter manicures allow for more flexibility and creativity at home. With practice, it’s possible to achieve salon-quality results at a fraction of the cost. Home manicures also offer the convenience of touching up or changing designs more frequently. To achieve the best results at home, invest in quality white polish, glitters, and tools. Watch tutorials and practice different techniques to improve your skills. Remember to work in a well-lit area and take your time with each step. Whether opting for professional or DIY, both approaches can result in beautiful white nails with glitter that express your personal style.
Removing Glitter from White Nails
Removing glitter from white nails can be challenging, but with the right techniques, it becomes a manageable process. Start by soaking a cotton pad in nail polish remover and placing it on the nail. For stubborn glitter, use foil wraps to keep the cotton pad in place and increase effectiveness. Leave the wraps on for 5-10 minutes to allow the polish remover to break down the glitter and white polish. Gently slide off the foil and cotton, using light pressure to remove as much glitter as possible. For remaining glitter particles, use a wooden cuticle stick or an old toothbrush to gently scrub the nail surface. Be careful not to damage the natural nail during this process.
Another method involves using a peelable base coat under the white polish and glitter. This allows for easier removal by simply peeling off the entire manicure. After removing the glitter and polish, gently buff the nails to smooth out any rough spots. Follow up with cuticle oil and hand cream to nourish the nails and surrounding skin. If struggling with glitter removal, consider visiting a salon for professional assistance. They have specialized tools and techniques to remove glitter without damaging the nails. Remember to give your nails a break between manicures to allow them to recover and stay healthy.