How to Take Out Tape In Extensions: Removing Safely
Hair extensions have become a popular way to achieve longer, fuller locks without the commitment of natural growth. Among the various methods of applying extensions, tape-in extensions are favored for their natural look and ease of maintenance. However, knowing how to take out tape in extensions is essential to ensure both the health of your natural hair and the longevity of the extensions. In this comprehensive guide, we will explore the best practices and detailed steps to remove tape-in extensions safely and effectively.
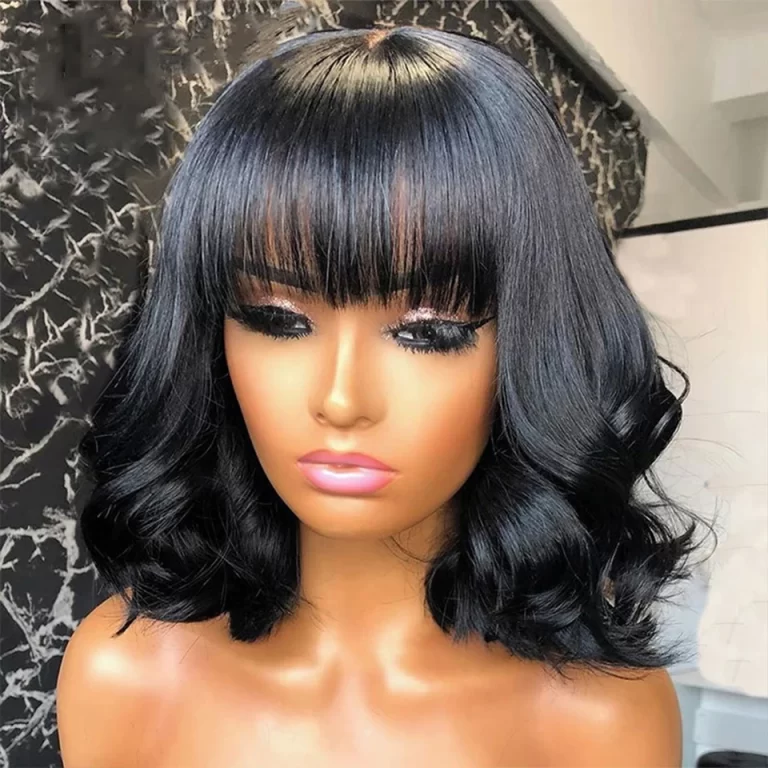
Introduction to Tape-In Hair Extensions
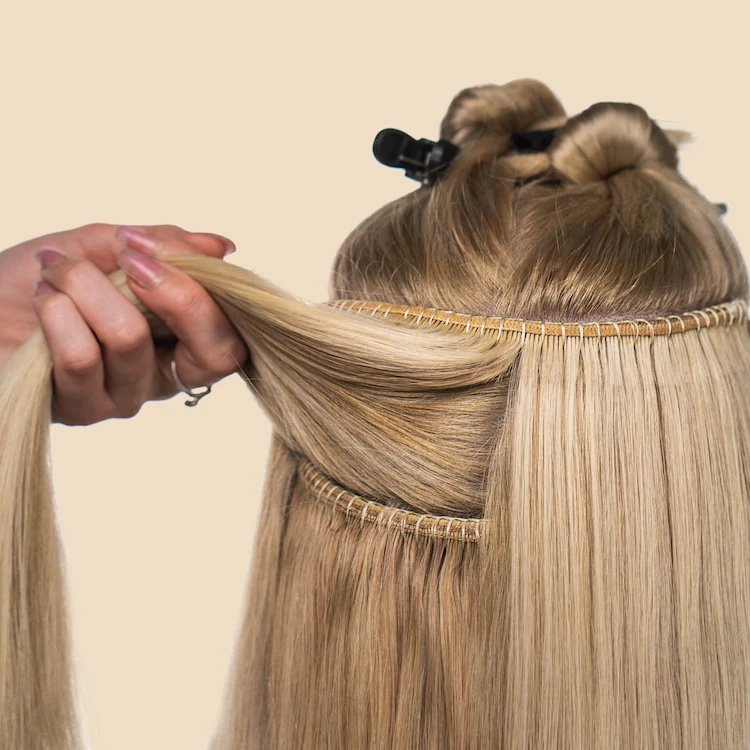
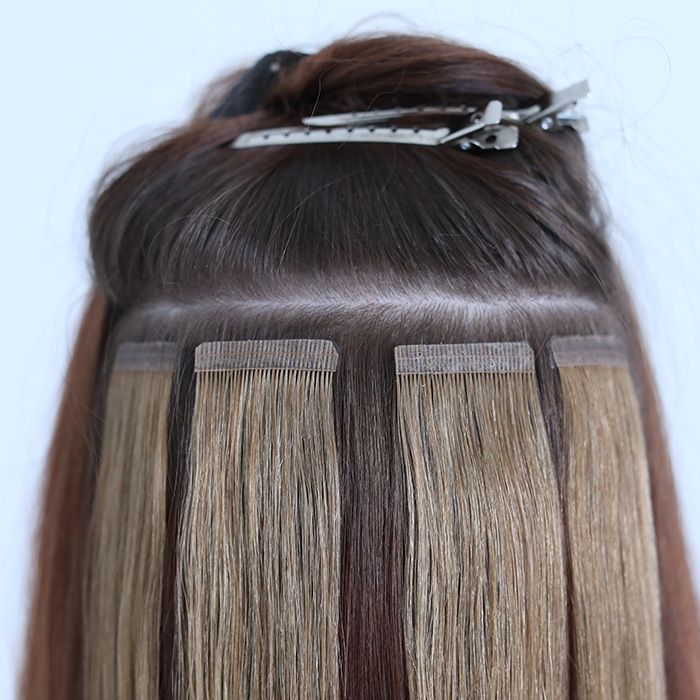
Tape-in hair extensions are a popular choice for adding length and volume quickly. Thin, invisible strips of adhesive tape attach these hair pieces to your natural hair. They are lightweight and can blend seamlessly when done right. Many prefer them for their relatively easy application and removal process. However, knowing how to take out tape in extensions safely is vital. It prevents damage to your natural hair. This guide ensures you can remove these extensions without a trip to the salon. With the right tools and methods, you can maintain the health of your hair. Let’s explore the essential steps needed for a smooth and safe removal.
Essential Tools and Products Needed for Removal
Before you begin the process of how to take out tape in extensions, gather the necessary items. Having the right tools and products at hand ensures a smoother removal process. Here is what you’ll need:
- Oil-Based Remover: You can use a specific tape-in extension remover or any oil-based product. The oil helps to weaken the adhesive bond, making it easier to slide the extensions out.
- Fine-Tooth Comb: A comb with fine teeth helps to gently work through your hair, detangling as you go along.
- Hair Clips: These will help section your hair and keep the rest out of the way while you focus on one tape at a time.
- Cotton Pads or Balls: You’ll use these to apply the oil-based remover directly onto the tape areas.
- Gloves: To protect your hands from getting sticky and to avoid transferring oils from your fingers to your hair.
Start by ensuring you have a well-lit workspace and a mirror large enough that you can see the back of your head. Good lighting and a clear view are important to avoid missing any extension tapes. Remember, patience and care are key throughout the removal process to avoid damaging your hair.
Preparing Your Hair for Extension Removal
Before you start the process of how to take out tape in extensions, it’s important to prepare your hair. Proper preparation ensures an easier and safer removal experience. Here are the steps you should follow:
- Wash Your Hair: Begin by washing your hair gently. Use a clarifying shampoo if available. This helps to remove any styling products or residues that may hinder the removal process.
- Dry Thoroughly: After washing, make sure your hair is completely dry. This reduces the risk of tangling and makes it easier to see the bonds.
- Detangle Your Hair: Use a wide-tooth comb to gently detangle your hair. Start from the ends and move up to the roots. Work carefully around the tapes.
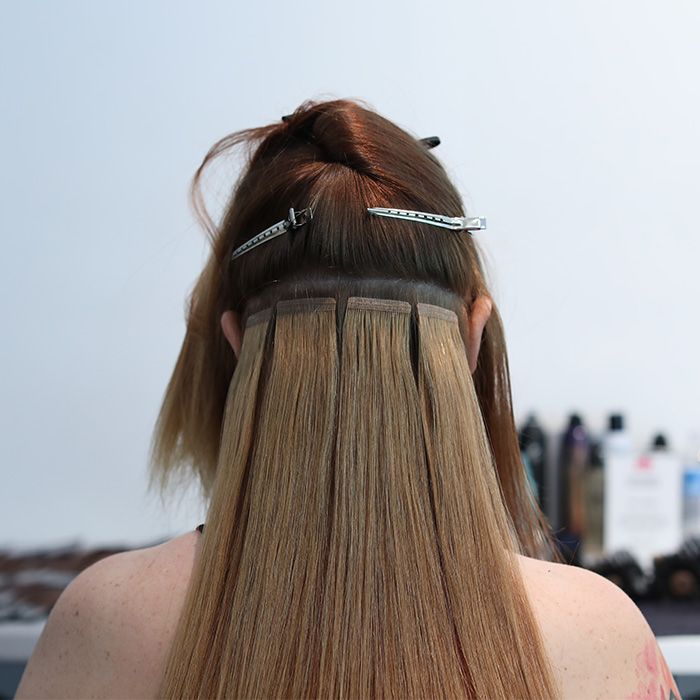
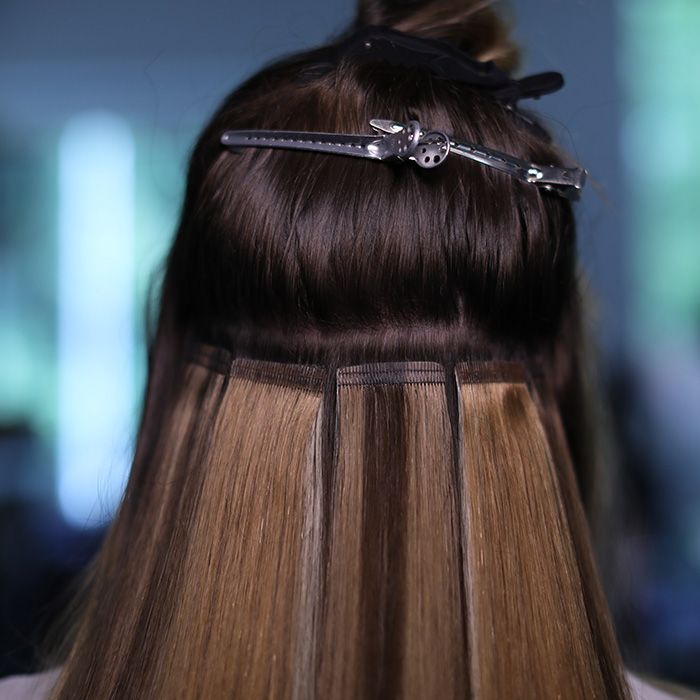
- Section Your Hair: Once detangled, use hair clips to section your hair. Ensure you can access the tapes easily. Deal with one section at a time for better control.
By preparing your hair in these ways, you set yourself up for a successful removal process, causing minimal stress to your natural hair.
 Step-by-Step Guide to Removing Tape-In Extensions
Removing tape-in extensions at home can be straightforward if you follow these steps closely.
- Apply Oil-Based Remover: Start with the bottom sections of your hair. Apply your oil-based remover to cotton pads or balls. Press them onto the tape pieces and wait a few moments. The oil softens the adhesive, making it easier to separate.
- Gently Peel the Tapes: Once the adhesive loosens, use your fingertips to slowly peel the extensions away from your hair. If they resist, reapply the remover and wait a bit longer.
- Slide the Extensions Out: Hold your natural hair above the bond with one hand. With the other hand, slide the tape piece down and out of your hair.
- Remove Residue: After all the extensions are out, use a fine-tooth comb to remove any leftover adhesive.
- Wash Your Hair Again: Use a clarifying shampoo to wash your hair. This helps remove any oil residue and leaves your hair clean.
Remember to work slowly and be gentle throughout the process. Rushing can cause damage to your natural hair. If you hit a snag, don’t force it. Apply more remover and try again.
Tips and Tricks for an Easier Removal
When attempting how to take out tape in extensions at home, some extra tips can ease the process.
- Warm the Oil Remover: Before applying, warm the oil remover slightly. This can enhance its ability to weaken the adhesive.
- Use a Timer: Give the oil-based remover time to work. Set a timer for at least a minute before trying to peel the tapes.
- Work in Small Sections: Avoid feeling overwhelmed by working with small sections of hair at a time. This gives you better control.
- Avoid Water: Don’t use water during the removal process. Water can cause the tapes to strengthen the bond again.
- Patience is Key: Take your time. Hurrying might cause unnecessary pain or hair damage.
- Use a Slip Agent: If tapes are stubborn, a little more slip agent, like conditioner, can help.
- Check for Leftover Tape: After removal, feel through your hair for any missed pieces. Small strips can be easy to miss.
- Keep Hair Taut: Hold the hair above the tape taut to avoid pulling and stressing your roots when sliding out the tapes.
By following these practical tips, you can remove tape-in hair extensions smoothly and reduce the risk of damaging your natural hair. Patience, the right technique, and care are your best allies in this process.
When to Replace Tape-In Extensions
Understanding when to replace your tape-in extensions can help maintain your desired look and prevent hair damage. Generally, tape-in extensions last between six to eight weeks before needing a repositioning or replacement.
Signs It’s Time to Replace Extensions
- Visible Slippage: If the extensions start to slip or move, it’s a sign that the adhesive is weakening.
- Discomfort: Any discomfort or pulling sensation indicates that the extensions are no longer secure or compatible with your natural hair.
- Damage to Natural Hair: If you notice increased hair breakage or thinning around the extension areas, it’s time to remove and replace them.
Extending the Lifespan of Your Extensions
Proper care can extend the lifespan of your tape-in extensions. Wash your hair gently, avoid excessive heat, sleep with your hair braided or in a loose ponytail, and keep the extensions dry to prevent the adhesive from weakening prematurely.
Caring for Your Natural Hair After Removal
After you have learned how to take out tape in extensions, the next important step is to ensure that your natural hair remains healthy. Here are some tips to care for your hair post-removal.
- Deep Condition: Apply a deep conditioning treatment. It helps replenish moisture and nutrients to your hair.
- Trim Ends: Get a trim if needed. It removes split ends and encourages healthy growth.
- Avoid Heat Styling: Give your hair a break from heat styling tools. Let your hair air dry when possible.
- Gentle Brushing: Brush your hair gently with a wide-tooth comb or a soft-bristled brush. Start from the ends and work your way up.
- Balanced Diet: Eat a balanced diet rich in vitamins and minerals. It supports hair health from the inside out.
- Use Satin Pillowcases: Sleep on satin pillowcases to reduce friction and prevent breakage.
By following these steps, you can help your hair recover from the extension removal and maintain its strength and shine.
Troubleshooting Common Issues During Removal
Understanding how to remove tape-in extensions can make the process easier. Yet, sometimes you might encounter issues. It’s important to troubleshoot these problems without harming your hair. Here are common challenges and how to handle them.
- Tape Won’t Release: If the tape does not loosen, reapply oil-based remover. Let it sit longer, but avoid pulling.
- Hair Feels Sticky: If there’s a sticky residue, use more oil to saturate. Comb gently until it slides out.
- Tangling Near The Tape: Be patient. Detangle the rest of your hair first, then address the tapes carefully with a fine-tooth comb.
- Tape Residue After Washing: Apply a bit of oil to the area. Then wash with clarifying shampoo.
- Discomfort While Removing: If you feel pain, stop. Apply more remover, and then try again gently.
These tips should help solve most issues that arise when learning how to take out tape in extensions. Remember, patience and careful handling are your best tools during this process.
 When to Seek Professional Help
Even with a careful approach on how to take out tape in extensions, certain situations may arise where professional assistance is necessary. Recognizing these moments can save you from damaging your hair. Consider seeking help from a hairstylist if:
- Persistent Stickiness: If after several attempts, there’s still a residue you can’t remove.
- Excessive Tangling: If there are severe knots near the tapes that you can’t untangle without breakage.
- Discomfort or Pain: When the removal process causes persistent pain, or if your scalp becomes irritated.
- Unsure of Technique: If you’re not confident in your ability to remove the extensions safely.
- Hair Loss: If you notice significant hair loss as you remove the tapes.
A professional hairstylist can ensure that your tape-in extensions are removed correctly, minimizing damage and maintaining the integrity of your natural hair. Their experience allows them to handle challenging situations with the right techniques and products. Remember, it’s better to be safe than sorry, so don’t hesitate to contact a professional if you are in doubt or the removal process isn’t going smoothly.
Alternative Methods for Removing Tape-In Extensions
While the above method is effective, there are alternative ways to remove tape-in extensions if you prefer a different approach.
Using Oil-Based Removers
Oil-based removers can also effectively dissolve the adhesive. Apply a generous amount of coconut oil, olive oil, or specialized extension removal oil to the tape area, letting it sit for several minutes before gently peeling off the extensions.
Professional Salons
Visiting a professional salon is another option. Stylists have access to professional-grade products and possess the expertise to remove tape-in extensions with minimal risk of damage to your natural hair.
 Frequently Asked Questions About Removing Tape-In Extensions
Can You Remove Tape-In Extensions Yourself?
Yes, you can remove tape-in extensions yourself by following the proper steps and using the right products. However, if you’re unsure or uncomfortable with the process, seeking professional help is advisable.
How Long Does It Take to Remove Tape-In Extensions?
The removal process typically takes about 30 to 45 minutes, depending on the number of extensions and the method used.
Is Removing Tape-In Extensions Damaging to Natural Hair?
When done correctly, removing tape-in extensions should not cause significant damage to your natural hair. Following the proper steps and avoiding forceful removal are crucial to maintaining hair health.
How Often Should You Get Your Tape-In Extensions Repositioned?
Tape-in extensions should be repositioned every six to eight weeks to ensure they remain secure and to prevent damage to your natural hair.
What Should I Do If My Hair Feels Dry After Removal?
If your hair feels dry after removing extensions, focus on deep conditioning treatments and regular moisturizing. Avoid heat styling and use gentle, hydrating hair care products to restore moisture.
Enhancing the Removal Experience
To make the removal process as smooth as possible, consider these additional enhancements:
Use a Mirror
Using a mirror, especially a hand-held one, allows you to closely inspect the removal area, ensuring you remove all extensions thoroughly.
Keep Your Hair Clean
Before starting the removal process, ensure your hair is clean and free from heavy styling products. Clean hair allows the adhesive remover to work more effectively.
Stay Relaxed
Staying calm and relaxed during the removal process can make it more comfortable. If you feel tense, take a break and continue once you are more at ease.
Conclusion: Mastering How to Take Out Tape in Extensions with Care
In conclusion, knowing how to take out tape in extensions is essential for maintaining both the health of your natural hair and the longevity of the extensions. By following the step-by-step guide, preparing adequately, avoiding common mistakes, and caring for your hair post-removal, you can ensure a safe and effective removal process. Whether you choose to remove the extensions yourself or seek professional assistance, understanding the correct techniques will help you achieve the best results. Embrace these practices, and you’ll enjoy beautiful, healthy hair with or without extensions.